There is no such thing as a universal product design process. Every org is different and uses the process that works best for its needs. Yet, it’s possible to establish a general set of actions that (with some alternations) work for many companies.

Product Design Cheatsheet is a helpful document created by Prophecy that provides a step-by-step workflow for product development, focusing on 6 key stages of the design process.
1. Research
Research is the foundation of the product design process. This stage involves gathering qualitative and quantitative data to understand the target users, their needs, behaviors, and pain points.
Things to do:
- Write research questions: Start by framing what unknowns you need to explore and what objectives you hope to achieve. Formulate clear questions that will guide your research activities. For instance, “What are the major pain points for our users when using similar products?”
- Conduct user interviews: Interview people who represent your target audience to understand their behaviors, needs, and problems.
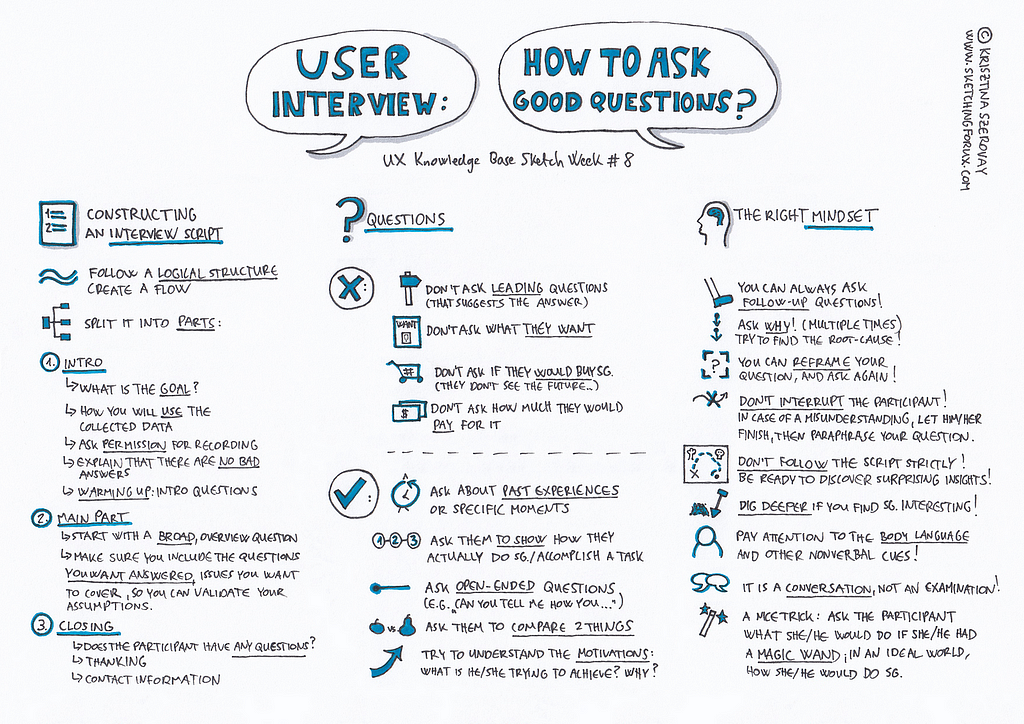
- Conduct stakeholder interviews: Interview stakeholders to outline business goals and objectives.
- Analyze quantitative data: Use quantitative methods such as surveys to collect data so you can rely on it during ideation. Gather data on competitor products, market trends, and potential audience demographics.
2. Synthesis
This phase focuses on organizing and making sense of the data gathered during research to uncover patterns and insights. Synthesis helps translate raw data into actionable insights for the next stages.
Things to do:
- Map the user’s experience: Visualize how users interact with your product or system. Depending on your goal, you can map the current (how users interact with the system right now) or future state of a product(how they are supposed to interact with a product).
- Identify key points: Focus on understanding pivotal moments in the journey. Form a hypothesis about user behavior.
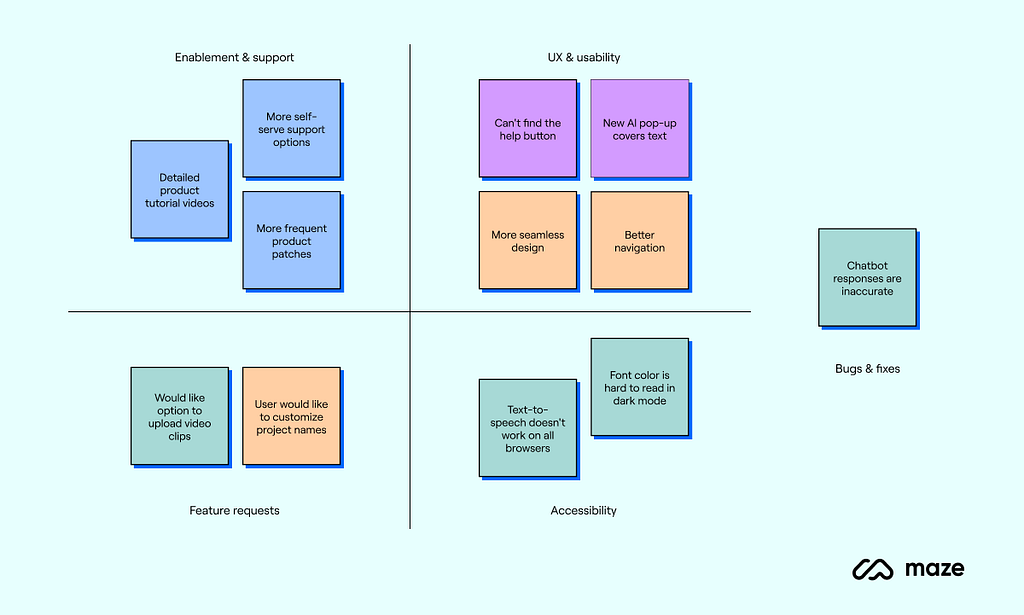
- Do affinity mapping: Look for patterns in user feedback or data to find themes. Group similar insights, feedback, or observations to reveal patterns and themes in the data.
- Synthesize learnings: Pull together your insights to better understand user needs. The earlier you create a centralized knowledge hub with insights about user behavior, the more time you save when ideating your solution because it will help you draw conclusions from patterns in data and decide on the primary areas to address.
3. Ideation
Ideation is the creative phase where ideas are generated and refined into potential solutions. It involves turning research insights into actionable ideas and narrowing down to the most promising concepts.
Things to do:
- Brainstorm solutions: Generate ideas based on user insights. Don’t set strict constraints right from the start because it can limit your creativity.
- Turn ideas into design opportunities: Frame these ideas as “how might we” questions. For example, “How might we make the product more accessible for visually impaired users?”
- Demo concepts: Make sure you validate if the ideas fit the user context (user value) and business context (business value) before moving forward. Present the ideas to your team or stakeholders and assess if they align with user needs and context.
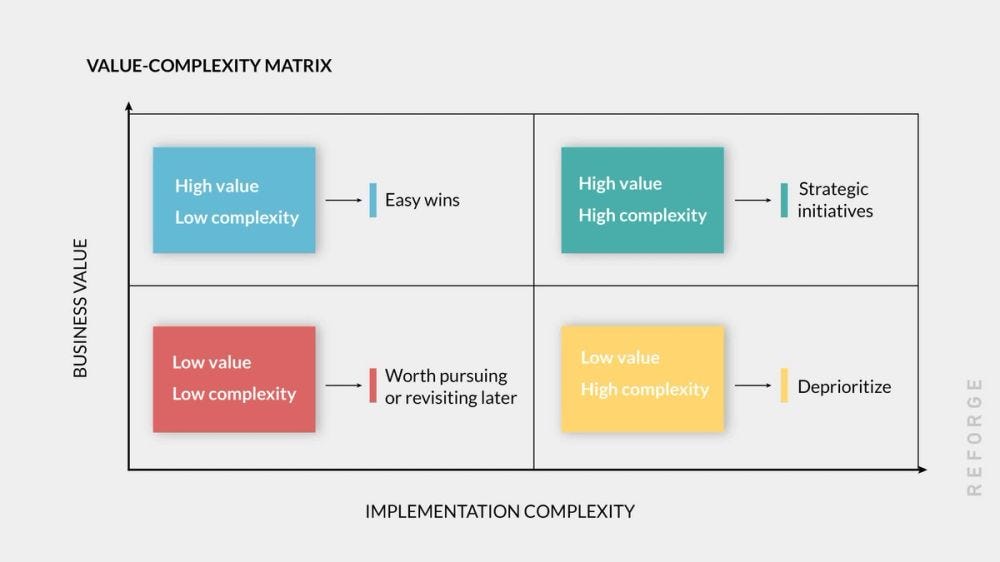
- Choose the best concepts: Use a 2×2 matrix (Low-High User Value, Low-High Design Effort) to rank the most promising concept.
4. Prototyping
Prototyping involves creating representations of your ideas to test with real users. This step is essential for validating concepts and gathering feedback before investing in full-scale development.
Things to do:
- Define what to test: Identify the focus of your prototype testing — this could be testing the usability of a particular part of your solution. This will help you specify the scope of your prototype.
- Create prototypes: Build functional prototypes to get real feedback. Choose the appropriate fidelity for your prototype (low-fidelity sketches, high-fidelity clickable prototypes, etc.) depending on what you’re testing. The higher the fidelity, the more reliable insights about user behavior you will get.
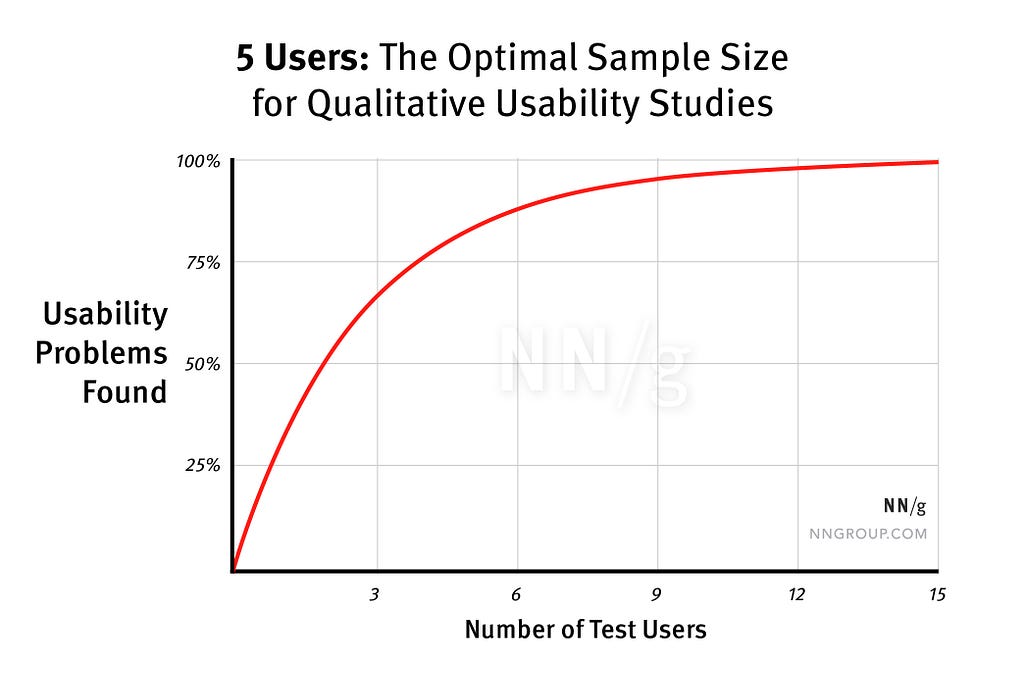
- Test with real users: Validate ideas by inviting users to interact with your prototypes. Test with at least 5 users to identify most usability issues.
5. Co-Creation
Co-creation is about involving users in the design process to help build a solution that meets their needs. This collaborative approach ensures the product aligns closely with user expectations.
Things to do:
- Collaborate with users: Use this process to build on ideas and involve users in shaping the final concept. Use methods like card sorting and run brainstorming sessions to actively involve them in refining the concept.
- Create modular components: Develop modular design components that users can interact with to suggest changes or improvements. This can help you refine ideas during collaborative sessions.
6. Iteration planning/design
This phase involves consolidating feedback and preparing the design for further development or more extensive testing. Iteration ensures continuous improvement and alignment with user needs.
Things to do:
- Collaborate with users: Build on ideas and involve users in shaping the concept. Document the changes or features that need adjustment based on user feedback.
- Continue testing and measure success: Use feedback from previous tests to improve concepts and move forward. Each iteration should bring the product closer to a final version that aligns with your design objectives.
- Summarize learnings: After testing, summarize what you’ve learned about users and iterate on your designs.
Want To Master Product Design?
Try Interaction Design Foundation. It offers online design courses that cover the entire spectrum of product design, from foundational to advanced level.
This post contains affiliate link(s)
Product Design Process was originally published in UX Planet on Medium, where people are continuing the conversation by highlighting and responding to this story.