
“From idea to app” is the slogan Google uses for its AI-powered UI generator, Stitch. I was playing with this tool for a while, and it made one thing very clear to me: this tool isn’t about “designing the final UI design for you.” It’s about getting you out of the blank-canvas problem faster.
In this article I want to go through my entire 3-step workflow using this tool and highlight the most important things you need to consider to make the most of it.
Step 1: Write a prompt & choose AI model
The first thing you need to do when using Google Stitch is to write a decent prompt. Similar to any other AI tools,
The better you articulate your intention, the more relevant output AI will generate for you.
The framework I use for writing prompts is called Zoom-Out-Zoom-In. I start by creating a proper context for my product and explaining its target user, then zoom in on the actual screen/page design I want to generate, explaining the goal of a particular screen/page, its layout hierarchy, and the design constraints the AI should consider when generating it. Finally, I mention expectations I have about the screen that AI will generate for me.
Below is a sample prompt that I’ve used for my demo:
Context:
Design a mobile app screen for a personal finance app that helps users track daily spending.

User:
Young professionals who check expenses multiple times per day, often on the go.

Goal of the screen:
Help users quickly understand
- Today’s total spending
- Top spending categories
- Whether they are over or under budget

Screen type:
Home / Dashboard (iOS-style mobile UI)

Layout & hierarchy:
- Sticky header with app name and current month
- Primary focus: large total spending number for today
- Secondary section: horizontal category cards (Food, Transport, Shopping, Other)
- Tertiary section: simple list of recent transactions (last 3–5 items)

Components:
- Header with subtle divider
- Large numeric value with supporting label
- Card-based category summaries with icons
- List items with merchant name, category tag, and amount

Visual direction:
- Clean, minimal, calm
- Neutral background with soft accent colors for categories
- Emphasis on readability and glanceability
- No heavy gradients or decorative elements

Constraints:
- One-hand usage
- Prioritize clarity over density
- Accessible text sizes and spacing

Output expectation:
Generate a structured mobile UI layout that clearly communicates hierarchy and component placement, suitable for handoff to Figma for visual refinement.
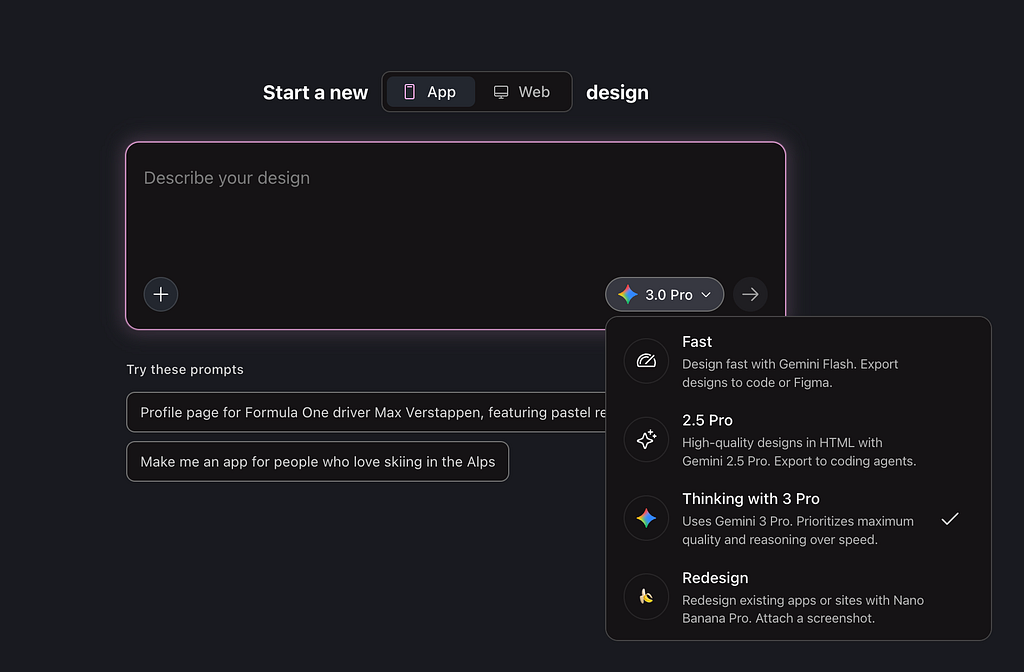
Apart from the prompt, you need to choose a couple of things:
- Medium: App or Web design. Based on my experience, Google Stitch works best for mobile app design, and is less effective for web.
- AI Model. I go with the latest Google 3 Pro, which is also used in Gemini and is capable of doing AI-powered research when generating design. This comes in handy when AI needs to conduct additional research or dig into specific areas of your product to find a perfect solution.
Step 2: Analyzing output generated by AI & refining it
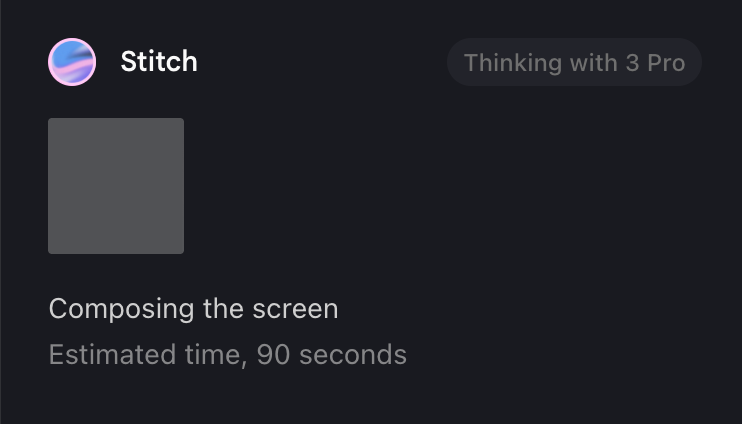
Once you submit the prompt, Google Stitch will start working on it. The nice thing about this tool is that it provides an estimate of how much time it will take to generate the design. For my example of a mobile app (prompt listed above), Google Stich estimated 90 seconds for generation, which is very impressive. Even more impressive is that this estimation is accurate.
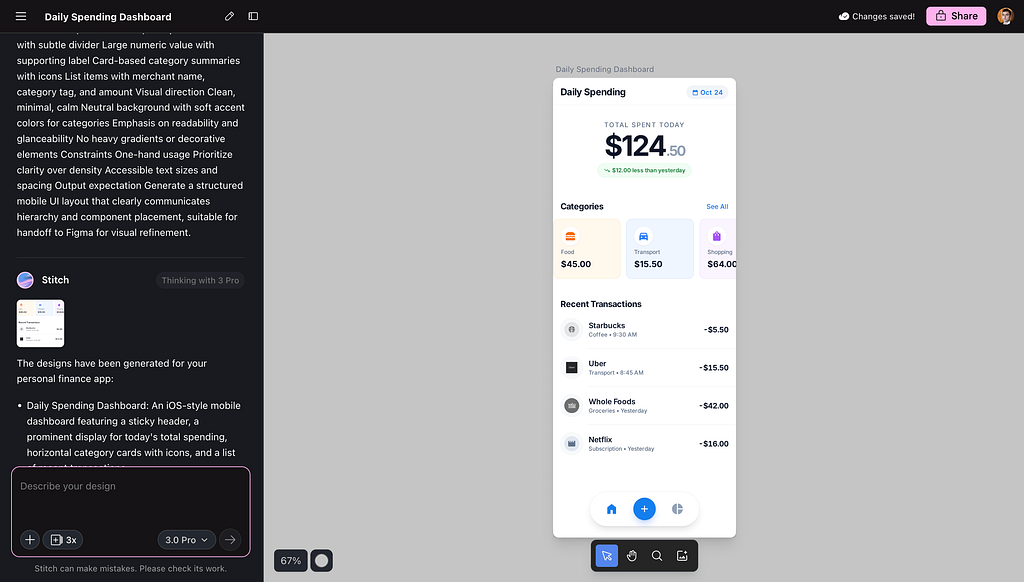
And here is the output that Google Stitch generated for me. As you can see, it’s a pretty basic UI that looks more like a mid-fidelity mockup rather than a high-fidelity final design. Quick note: I kinda like that AI generates design in this fidelity, as this design doesn’t look like a final solution and motivates me to refine it with AI.
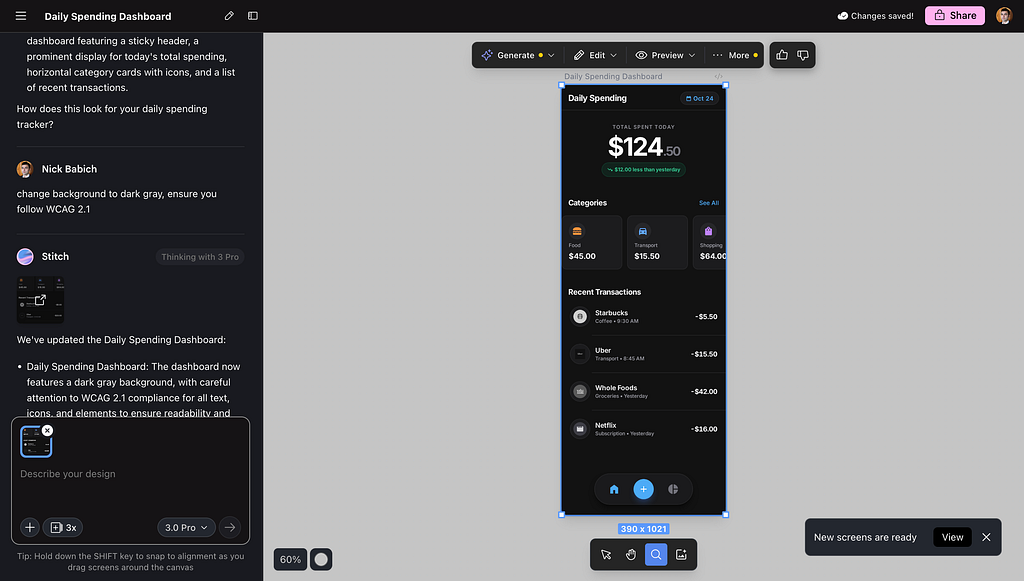
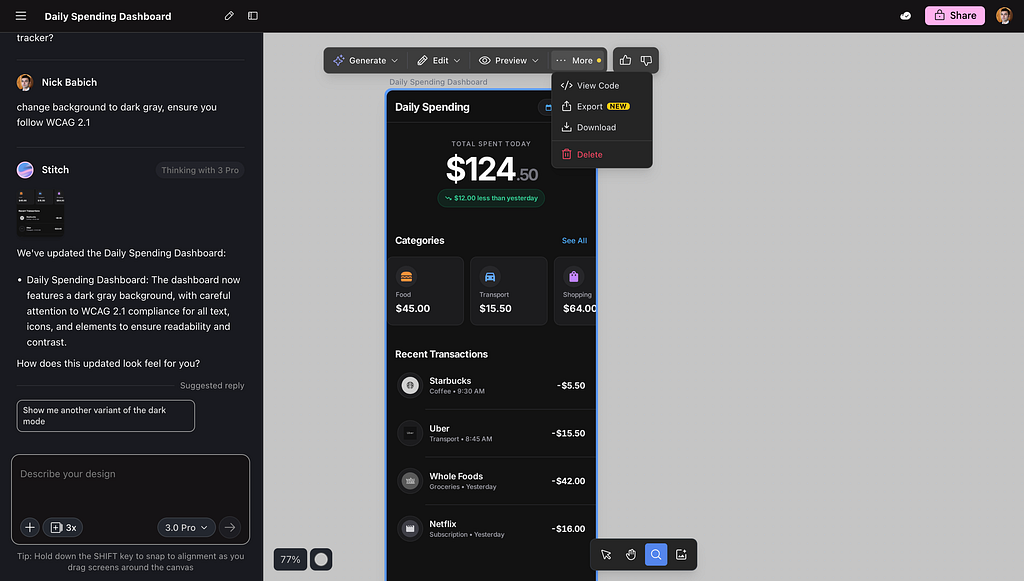
The great thing about Google Stitch is that we can easily refine the output by submitting follow-up prompts, providing additional details to the AI. In my case, I will ask the tool to change the background of the screen to dark gray and mention the importance of following WCAG 2.1 (at the end of the day, I want to craft an accessible UI).
Full prompt:
Change background to dark gray, ensure you follow WCAG 2.1
The output that Stitch generated for me:
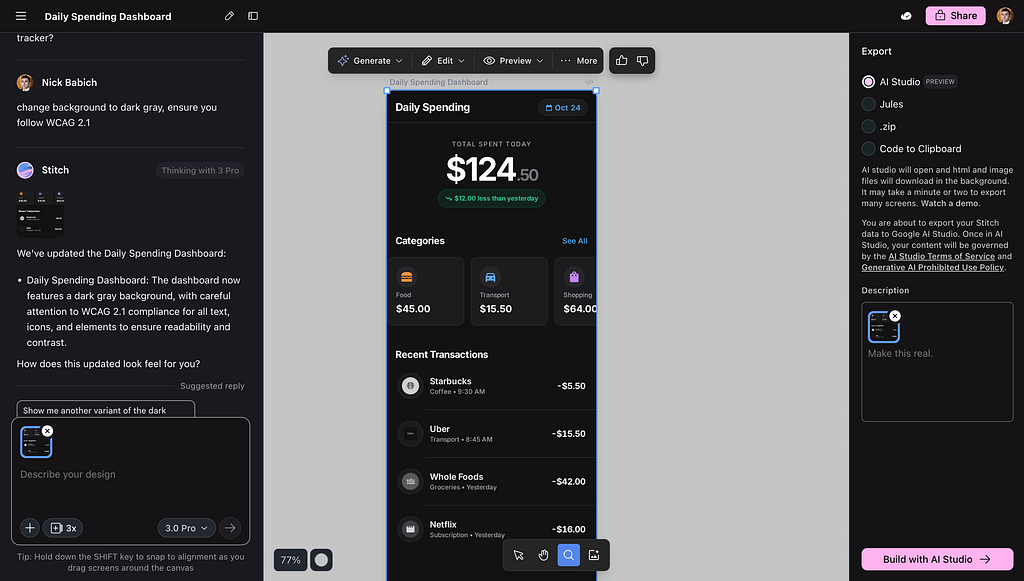
Step 3: Export solution
Google Stitch provides a few options for exporting a generated solution.
First, you can export code (click on View Code), and the tool will generate code for you. Note that the tool doesn’t allow you to choose a tech stack for your solution, so that the code you will get will be HTML + TailwindCSS, which might not be relevant to you (ie, if you’re working with SwiftUI).

If you click Export, you will see a menu with options to export the entire archive with your data (code+image assets). Unfortunately, there is no option toexport your designs directly to Figma.
Want to master AI-powered product design?
Join my free workshop, “Vibe design with AI” a 30-minute live, practical session where I’ll show you how to use popular AI image generators like Midjourney and NanoBanana Pro, along with specialized UI tools such as Figma Make and Figma MCP, to streamline your design process.
![]()
Google Stitch for UI Design was originally published in UX Planet on Medium, where people are continuing the conversation by highlighting and responding to this story.