A guide to building motion systems with Lottie Creator
Every fine-crafted digital product has a secret ingredient that makes it stand out: motion that makes the interface feel intuitive. Imagine a button presses down & rebounds, or a card that slides with inertia rather than teleporting into place, or a menu unfolds with just the right amount of resistance. These are just a few examples of details that transform functional software into something people genuinely enjoy using.
When it comes to adding motion in product design, the real opportunity lies in building a motion system that is tied to the product’s DNA from the very beginning. In this article, we will explore how to make that shift, and how Lottie Creator, a web-based animation tool designed to create interactive motion, can help us with that.
Humans are wired to motions, not pixels
User interfaces layouts are made of pixels but people don’t interact with pixels. They think about design not as a collection of static screens/pages but rather a carefully orchestrated interactive experience. Before a user ever consciously evaluates your interface, their brain has already decided whether it “feels right” based on physics intuitions.
Cognitive science tells us that human brains are prediction machines. We unconsciously forecast where objects should go, how fast they should move, and how they should respond to force. When a digital interface respects these predictions, it feels effortless. When it violates them, something feels off, even if the user can’t articulate why.
It’s possible to formulate four universal physical principles matter most in UI motion:
- Gravity: Elements should accelerate as they fall and decelerate as they rise. A dropdown that eases in at the bottom and decelerates to a stop feels grounded. One that moves at constant speed feels robotic.
- Momentum: Objects in motion should continue in motion. When a user swipes a card, it should glide and gradually come to rest, not freeze the instant the finger lifts.
- Elasticity: Soft objects compress and rebound. A button that squashes slightly on press and springs back communicates tactility. It tells the user, “Yes, I received your input.”
- Resistance: Interfaces should push back when pushed too far. Pull-to-refresh rubber-banding, scroll boundaries that stretch and snap. These moments teach users the limits of an interaction without jarring error states.
Why Interactivity Amplifies the Effect
Physics-based motion is powerful on its own, but it becomes transformative when it responds to user input. This is where the concept of State Machines enters the scene and it works pretty much for all interactive elements. Imagine a button that compresses under your cursor, changes color on hover, and springs outward on click, adjusting its behavior in real time based on your actions. It genuinely feels like a physical object you’re actually touching.
This distinction between passive playback and active interactivity is exactly what Lottie Creator’s State Machines are designed to address.
Before we explore how they work, though, let’s establish what separates good motion from decorative noise. Every effective UI animation maps to one of 3 functional patterns:
- Cause → Effect: The user does something, and the interface shows the consequence. Tapping a send button triggers a paper-airplane animation that confirms the message is on its way. The motion acts as a sense of acknowledgement for the user.
- Input → Response: The interface reacts proportionally to the user’s action. Imagine you’re dragging a slider and watching a value update in real time. The response is continuous and directly tied to the input.
- State → Transition: The interface moves from one condition to another, and the animation bridges the gap. A navigation menu expanding, a card flipping to reveal details, a loading indicator morphing into a success checkmark. The transition shows spatial and logical relationships that would otherwise be invisible.
Quick tip: If you’re evaluating a particular animation (whether it brings any value or not), try the litmus test. If you remove a particular animation and the interface breaks cognitively (i.e., users lose context, miss feedback, or can’t track what changed) that animation was doing real UX work. If removing it changes nothing about comprehension, it was a visual garnish.
State machines: the engine of interactive motion
Now when you know the rules of physics and clear motion rules, it’s time to talk about how we build things. Implementing interactive, responsive animations has traditionally required developers to hand-code every transition. But Lottie Creator changes this equation with State Machines, a visual, no-code system that lets designers build interaction logic directly into their animation files.
What are State Machines?
At their core, state machines are a straightforward concept: your animation can exist in one of several defined states (i.e., idle, hovered, pressed, active, loading, complete), and transitions move it between those states when specific triggers occur (a click, a hover, a data update).
Think of it like a light switch. The switch has two states: on and off. Pressing it transitions between them. Now imagine a dimmer switch with states for off, low, medium, and high, where rotating the knob triggers transitions. That’s a state machine and Lottie Creator lets you build exactly this kind of logic visually.
How State Machines Work in Lottie Creator
The workflow in Lottie Creator follows a clear progression that fits naturally into a designer’s existing process, regardless whether you’re animating natively in Lottie Creator or importing work from tools like Adobe After Effects:
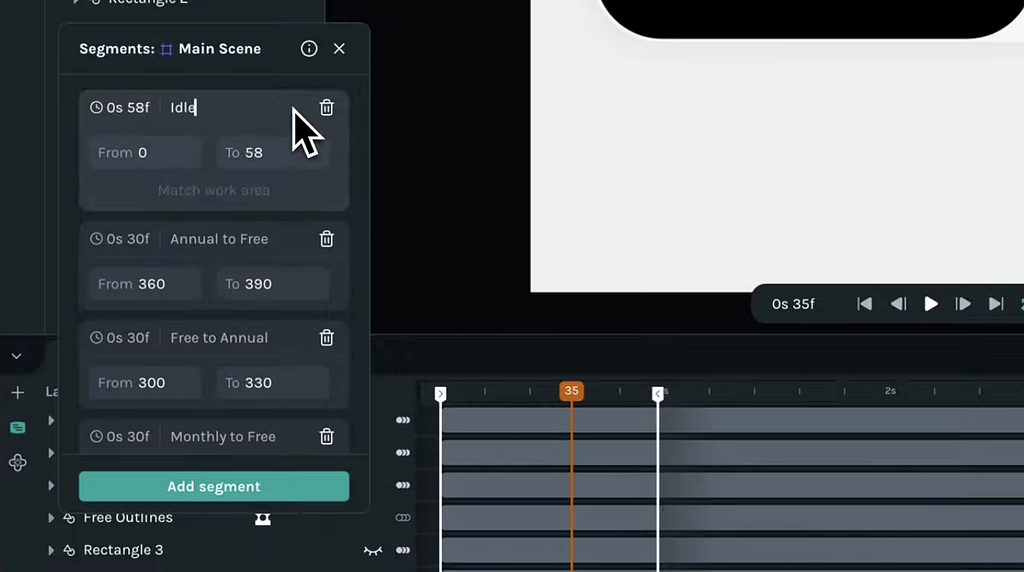
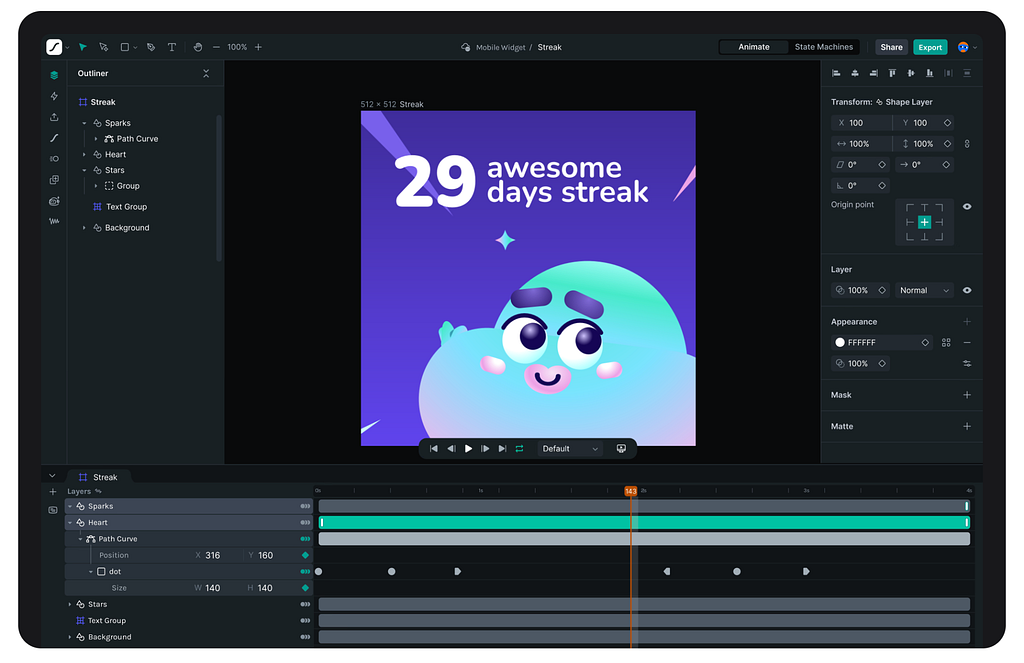
Step 1: Create your animation segments. Design your animation so that each interactive state occupies a distinct time segment on the timeline. For a button, this might mean frames 0–10 show the idle state, frames 11–20 show the hover state, and frames 21–35 show the pressed state.
Step 2: Define your states. In the State Machine editor, you map each segment to a named state. Each state has its own playback settings, whether it loops, its direction, its speed.
Step 3: Set up inputs. Inputs are the variables that drive your state machine. These can be booleans (isHovered: true/false), numeric counters (clickCount), strings, or events. Inputs store and recall information, functioning like the memory of your interaction.
Step 4: Build transitions with conditions. Connect your states and define the conditions that trigger each transition. For example: when isHovered changes to true, transition from idle to hover. When the user clicks (Mouse Down), transition from hover to pressed.
Step 5: Map interactions. Finally, connect real user actions to your inputs. Lottie Creator currently supports interactions like Mouse Enter/Leave and Mouse Down/Up, which you wire to your boolean or event inputs. When the user hovers, the interaction set isHovered to true; the state machine sees the change and fires the transition.
The entire logic (states, transitions, conditions, and interactions) is embedded directly in the exported .lottie file. When a developer drops that file into their project using a dotLottie player, it works out of the box on web, iOS, and Android. No re-implementation of animation logic in code. No miscommunication between design and engineering.
Prompt to State Machines: A Faster On-Ramp
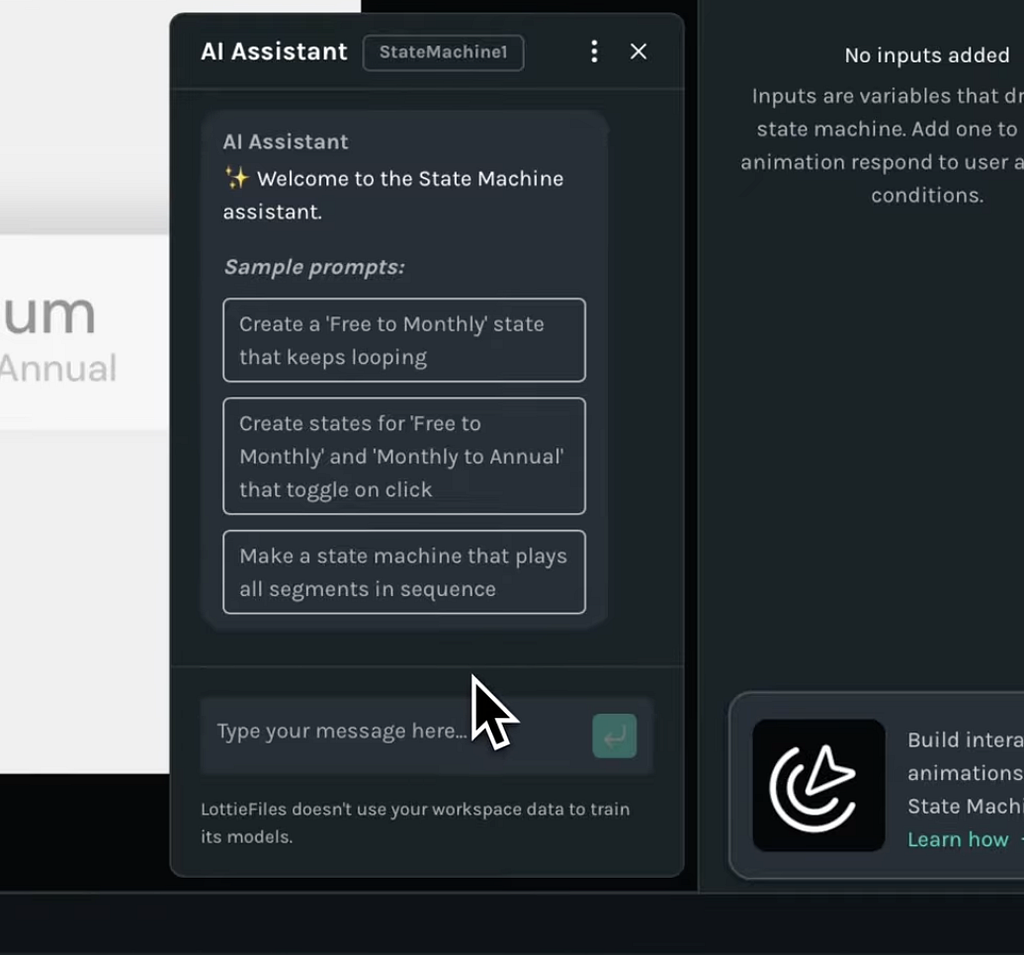
State machines are powerful, but building complex interaction graphs from scratch can feel intimidating, especially if you’re new to the concept. You have to create inputs, define transitions and double check every interaction to make sure it works fine. This can take a lot of time but, fortunately, there is a solution to this problem and it’s called Lottie Creator’s Prompt to State Machines feature.
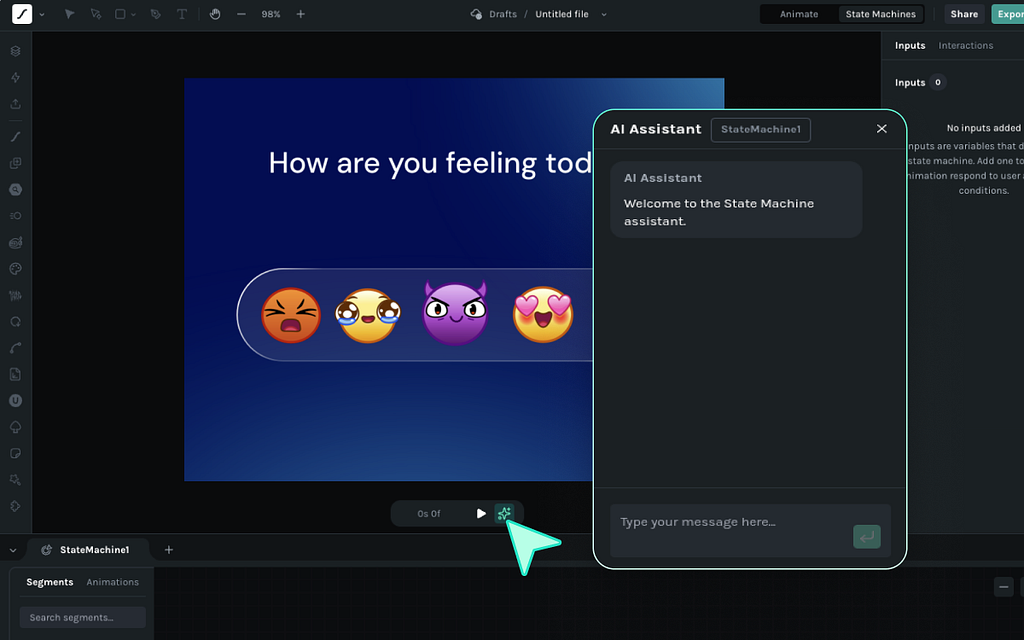
This AI Assistant allows you to build a fully-functional state machine in minutes.
The workflow is simple: after creating your animation segments (a necessary first step, as the AI needs segments to work with), you describe the interaction you want in plain language. Something like, “When the user hovers, play the hover segment. On click, play pressed and return to idle.” And in a few seconds, AI will create a ready-to-test animation for you. The cool thing is that all heavy lifting such as creating nodes, transitions, triggers, and conditions will be done by AI.

It’s possible to articulate 3 foundational principles that will help you write effective prompts:
Principle 1: Reference the actual segment names in your prompt
The more the prompt mirrors the segment names and layers, the more accurate the output will be. So the first thing you need to do is to clearly name your segments in the scene you’re building. To do that you need to define a section in a timeline, click on the segments button, hit Add Segments and give it a name.
Principle 2: Create proper context for AI
Be specific about what you want to see when using an AI assistant. Just like with any other AI tools, when it comes to State Machines, you need to create a proper context for AI so it can understand what you expect and why. For this very reason, you should avoid vague prompts that don’t explain triggers (what launches the motion effect) and actual transitions (how the transition should work).
Principle 3: Keep it smart and simple (KISS)
KISS is a universal principle in product design. When doing a new thing for the first time, start simple. If you’re just starting with Lottie State Machines, don’t try to create a fancy animation right from the beginning. Instead, start simple and craft basic effects such as a hover animation or a button click. This will help you understand how the tool works and reacts to different prompts.
The AI then generates the complete state machine (nodes, transitions, triggers, and conditions) as a visual node map that you can review, refine, and adjust.
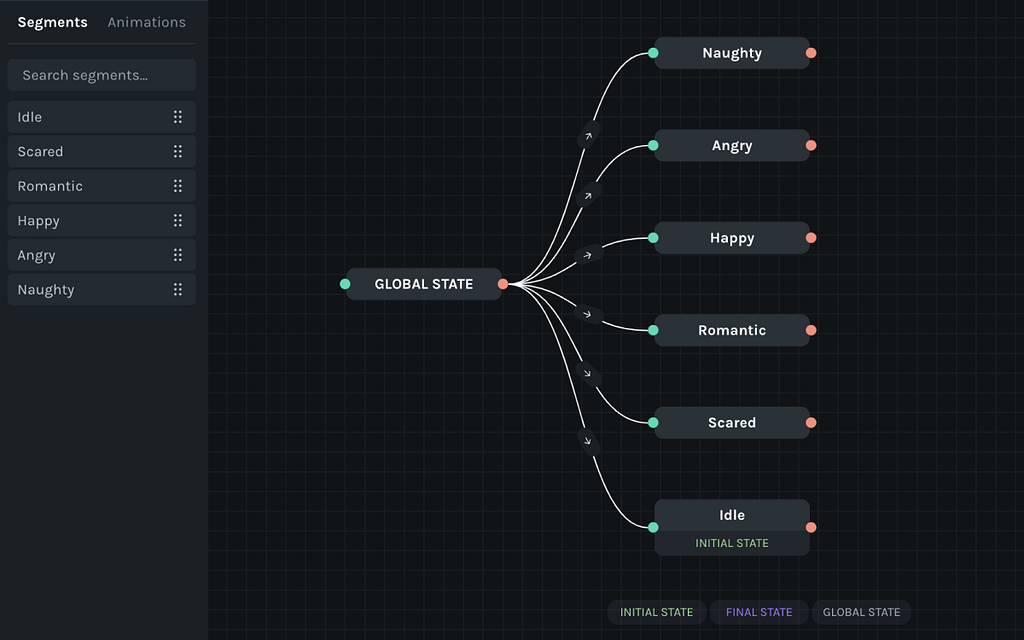
This dramatically lowers the learning curve. Designers who might hesitate to manually wire up a complex multi-state interaction can describe what they want conversationally and get a working starting point in seconds. From there, they can learn by examining and tweaking the generated logic, building confidence with each iteration.
Fitting Into Your Existing Workflow
One of Lottie Creator’s strengths is that it doesn’t demand you abandon your current tools.
Many designers today create their core animations in Adobe After Effects and then bring them into Lottie Creator to layer on interactivity. This is a perfectly valid workflow because you get the precision and expressiveness of After Effects for crafting motion, combined with Lottie Creator’s State Machine capabilities for making that motion respond to users. The key is that Lottie Creator is where your animation transforms from a passive clip into an interactive experience, regardless of where the raw animation originated.
From individual animations to motion systems
A beautifully crafted animation for a single button is impressive. But a single animation doesn’t make a product feel cohesive. What users actually experience isn’t individual effects in isolation; they experience the consistency (or inconsistency) of motion across every interaction, screen, and platform. This is why the shift from standalone animations to motion systems matters so much.
The System-Level Approach
Instead of producing individual animation files and hoping they feel unified, build a motion system. Follow the 2 foundational principles when doing it:
Principle 1: Define animation rules: Establish consistent easing curves, duration ranges, and physics parameters across your product (i.e., buttons always spring with the same elasticity; cards always slide with the same deceleration curve; loading indicators share a common rhythm, etc)
Principle 2: Follow the rules to define transitions: Once your rules are set, every new interaction follows the same patterns. A new component doesn’t need a bespoke animation; it inherits the system’s motion vocabulary.
The result is motion that is reusable across components, predictable for users who learn the system’s “language,” and scalable across your entire product ecosystem without each new screen requiring fresh animation work.
Great UX doesn’t just look right; it feels right!
We live in a physical world, and users expect digital interfaces to respond the way the physical world does, and fine-crafted motion effects are a secret sauce that make products so memorable and delightful.
Tools like Lottie Creator democratize motion design, making it accessible for everyone. You no longer need to hand off a spec and hope a developer interprets it correctly. You can build the interactive experience yourself, export it as a single file, and ship it across every platform your product touches. And the great thing is that creating interactive effects won’t take much time.
If you don’t believe me, you can try it yourself. Simply recreate one of the animations featured in this article in Lottie Creator https://lottiefiles.com/lottie-creator and let me know what you think about this tool in the comments.
![]()
The Physics of Great UX: Making Digital Interfaces Feel Real was originally published in UX Planet on Medium, where people are continuing the conversation by highlighting and responding to this story.