8 practical tips that will help you make the most of Figma Make
Figma Make is a new AI-powered “prompt-to-app” tool inside Figma that allows you to turn ideas (or existing Figma designs) into functional prototypes, web apps, and interactive UIs through natural language conversation. If you want to know more about this tool, check this video:
I recently spent a lot of time playing with Figma Make and want to share 8 insights that will help you make the most of this tool.
1️⃣ Start with a clear intent
Just like with traditional design tools, you’ll get the most out of AI tools (and Figma Make) when you start with a clear vision of what you want to build. When prompting Make, be specific and structured: describe the product and its purpose, layout design, and interactions together.
Always begin prompts with a context + goal format.
Example:
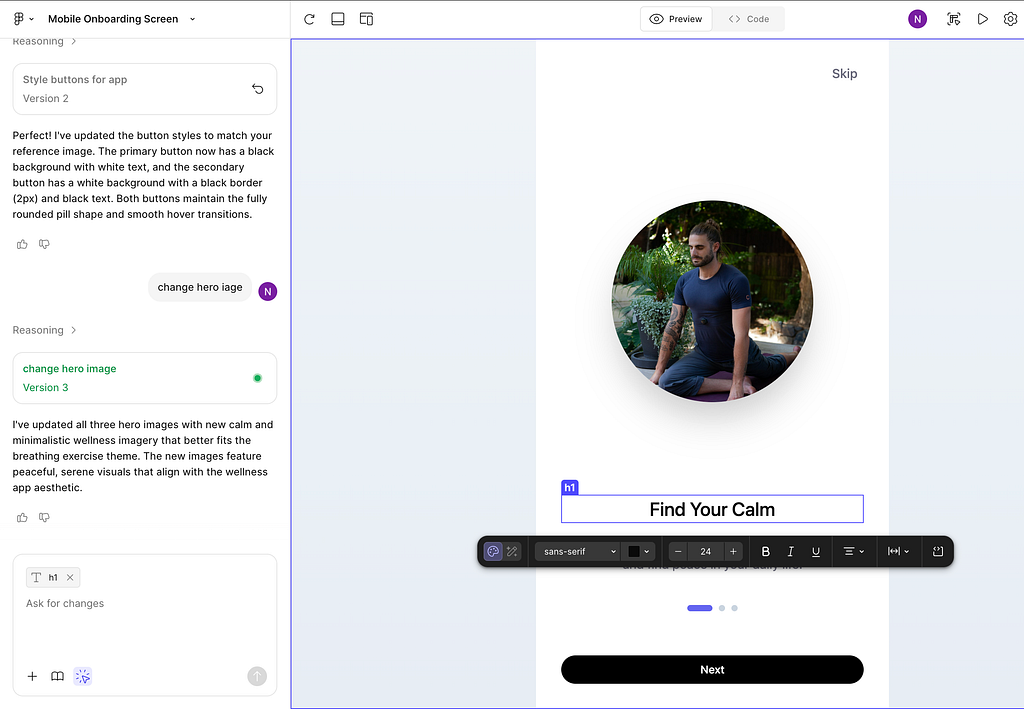
“Create a mobile onboarding screen for a wellness app focused on breathing exercises. Calm, minimalistic style.”
And after that, describe the actual layout of the screen you want to see
Example:
“This screen should feature an illustration, headline, description and button. Add slide transition and progress dots.”

💡 Tip: Mention the platform (“mobile app for iOS”, “web dashboard”, “Android tablet app”) and Make will do adjustments to spacing, typography, and component density according to the platform and viewport conventions.
2️⃣ Attach your design system or Figma components
One of the biggest advantages of using Figma Make over other AI design builders is its seamless integration with the Figma ecosystem. You don’t need to create a design from scratch; instead, you can use what you’ve designed in Figma and turn it into a coded prototype. There are two ways you can benefit from Figma native integration.
First, you can click “Import from Figma” and ‘attach’ a design you want to turn into code. This option is good when you already have a nearly finalized design (such as mid or high fidelity) and simply want to turn it into code.
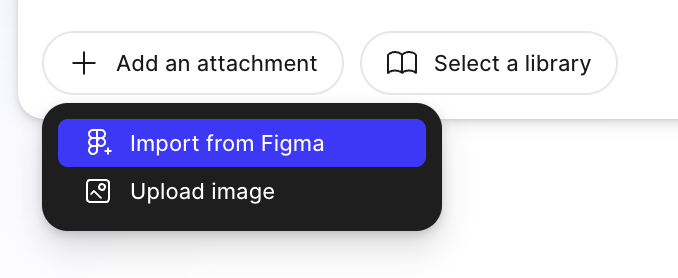
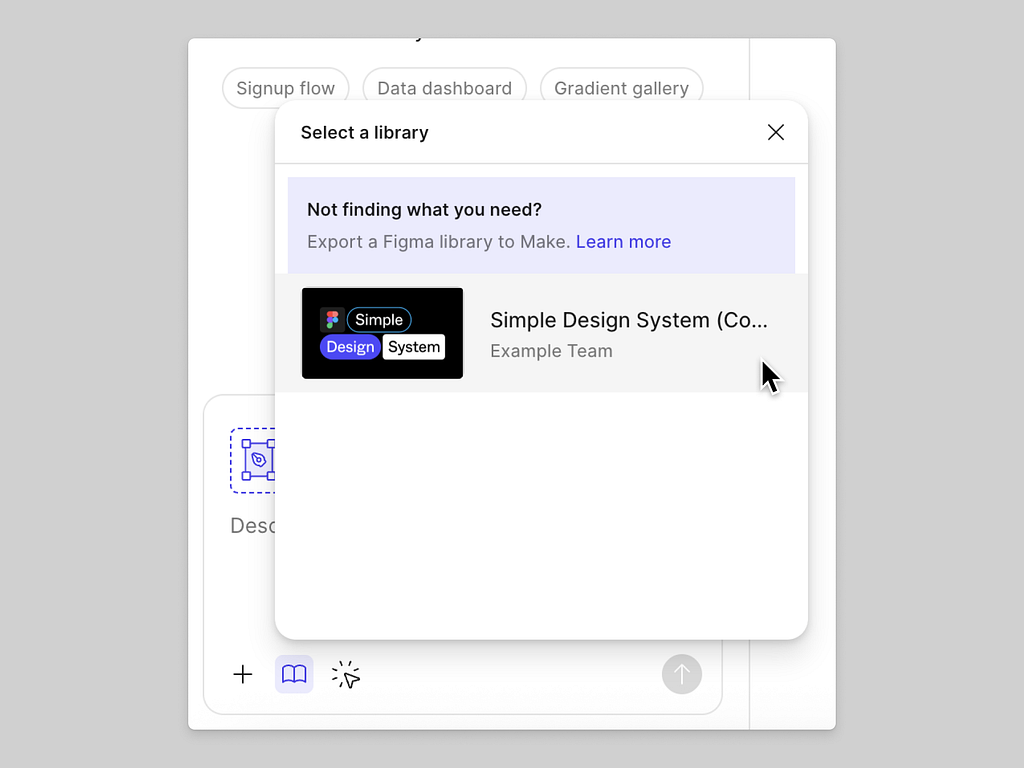
Second, you click ‘Select a library’ and export a Figma library to Make. Having a library in place will ensure Make respects your brand system and create UI using your colors, typography, and components rather than producing generic UI.
3️⃣ Provide visual references for UI components and use layout hints
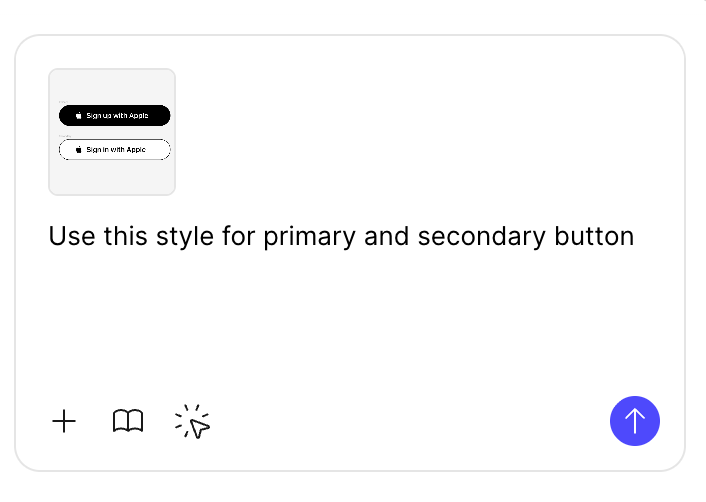
It can be hard to explain to AI what you want to build in plain words. Just like humans, AI tools can benefit from having references and hints on what something should look like.
If you want to provide a reference, you can drop existing designs of screens or components (i.e., buttons, cards, or navigation bars) in the prompt field and ask Figma to use them in design. Figma Make recognizes these and designs around them for consistent UI.
If you’re using Figma Make for layout exploration—to craft the layout structure of your future screen/page—you should add clues in your prompt, such as “2-column layout with hero left and form right” or “3 cards in a horizontal grid with equal spacing.” This will add essential constraints for AI to follow.
4️⃣ Mix manual edits with prompts
Figma Make gives you two ways of introducing changes — either by prompting AI or using Point and Edit mode. When you activate Point and Edit, you can click on the object you want to modify and manually change it right in the canvas. I suggest mixing AI mode and Point and Edit.
For example, you can tweak the design manually using “Point and Edit” mode, then prompt something like “Polish this design for better visual balance” for a hybrid human-AI workflow.
5️⃣ Re-use effective prompts
The more I interact with AI tools for generating UI design, the more I realize that I use the same prompts over and over again. Once I found a prompt that works well for me, I simply save it in my collection so I don’t need to write it again from scratch.
I suggest creating a personal “Prompt Library” file for different types of pages/screens (i.e., Landing Page, Dashboard, Form Screen, Empty State). You can use Google Docs with a table with a few columns, such as:
- Page/screen type (i.e., Landing page)
- Product category (i.e., eCommerce)
- Prompt sample (choose only the high-performing prompts!)
- Visual example (output by AI for this prompt)
💡 Tip: Create your own library of prompts. It might be tempting to use someone else’s prompts, but this approach is not very effective for one important reason: when you create your own library, you spend time playing with a tool and better understand nuances of its behavior (both strong sides and limitations of AI generation).
6️⃣ Use metaphors & moods
Emotions play an important role in UI design. Two screens that offer the same functionality can be perceived very differently depending on the mood they convey. Always give AI a clear idea of UI you want to see
“UI inspired by calm ocean waves”
“Layout with futuristic sci-fi aesthetics”
“Dashboard in Apple Vision Pro style.”
This approach is great for concept ideation and moodboarding.
💡 Pro tip: You can generate an image in Midjourney, attach it to Figma Make, and ask the tool to extract the color scheme/styling from it.
“Use this aesthetics for UI”
7️⃣ Experiment with design constraints
Once you have a UI design generated by Make, you can try to view it in different contexts.
“Same layout but optimized for iPad.”
“Convert this web layout into mobile version.”
To make UI look visually consistent across platforms, you can create a spacing tokens (8, 16, 24) and ask Make:
“Apply 8-point spacing system across layout.”
It often auto-aligns to your tokenized system.
8️⃣ Lock styles and certain sections
If you like a style (e.g., color palette or typography), select a few frames and type
“Keep this visual style”
at the beginning of the follow-up prompt. This helps Make generate new frames in the same visual language.
If you iterate your design with Figma Make and want to prevent the tool from changing some sections, when prompting Make, explicitly tell it what not to touch:
“Update the content in the main area, but don’t modify the header or footer sections.”
“Keep the sidebar layout as is — only restyle the cards.”
💡 ABC tips:
A: Use layer naming that says “do not edit.” If you export your design from Figma to Make, Make reads Figma’s structure and names as context. You can prefix layers you don’t want changed with labels such as:
- 🔒_locked_hero
- do_not_edit_footer
- no_modification_static_navbar
This signals to Make (and human collaborators) that these frames should remain untouched.
B: Be explicit. Make respects boundaries better when constraints are clearly described in natural language in your prompt.
C: Create snapshots. If you’re about to apply a major Make prompt—take screenshot of the current page/screen (“before” state).
🚨 New AI-powered product design community 🚨
If you’re passionate about building digital products and want to make the most of latest tools (including AI tools), I’d love for you to join me in the Product Design Community on Skool. You will have access to tutorials and cheatsheets for design and automtion tools as well as live Q&A sessions with me
👉 Join here: https://lnkd.in/dS-FTQ-G
![]()
Figma Make Tips & Tricks was originally published in UX Planet on Medium, where people are continuing the conversation by highlighting and responding to this story.