Deep dive into Anima AI agent for Figma
2026 is the year that redefines how we design products. In 2026, when we need to create a new design, we start with AI tools and co-create it together. And if just a couple of years ago, this co-creation was mainly AI acting as a supporting assistant that responds to questions from time to time. Now, it’s a powerful collaboration with AI integrated at the core of the product design process — AI more and more creates actual UI design.
There are two radically different approaches for creating UI design these days — one is allowing AI tools to create an entire design from start to finish and ship a coded prototype for you (it’s called autonomous AI design), and another is a more traditional approach when an AI tool creates a design and allows you to refine it in tools like Figma.
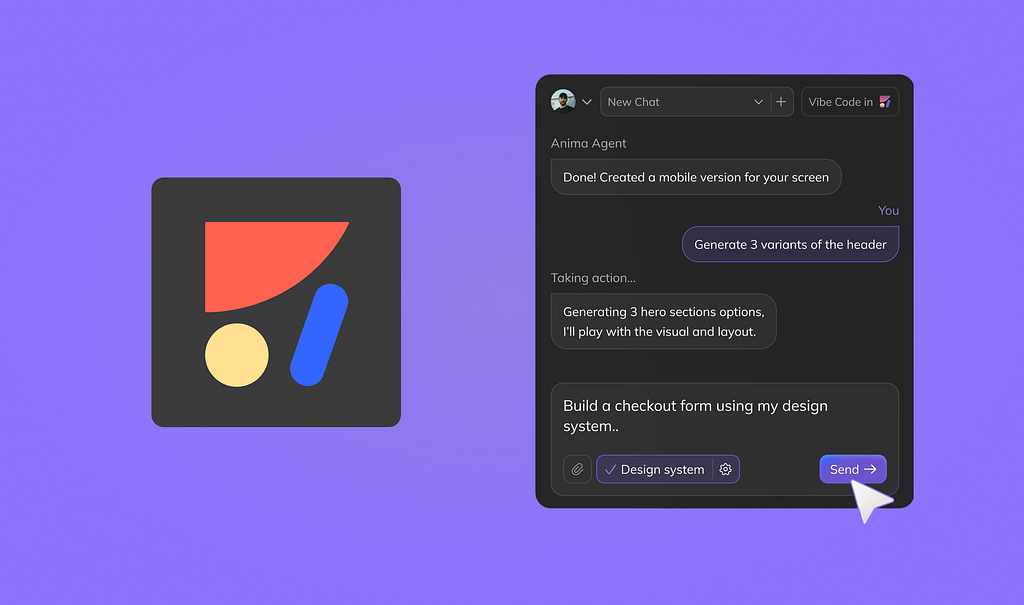
In this article, I want to review one of the most promising tools in the AI design space, called Anima Agent, which follows the second approach. This AI agent is capable of crafting very elaborate designs, and below I will share the entire process of tool setup and usage in 3 scenarios.
How to use Anima Agent in Figma
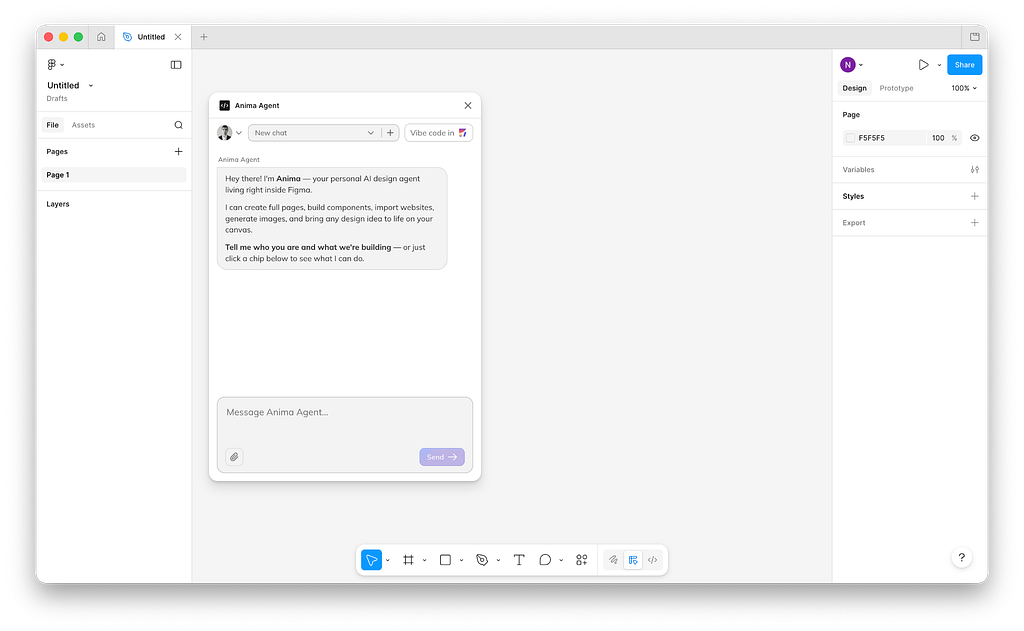
Anima Agent is a Figma plugin. So, in order to use this tool, all you need to do is click on Actions and search for an Anima Agent. Once you launch it, Anima will invite you to submit the prompt to generate UI design.
It’s important to mention which AI model will be used to perform the actual task. By default, Anima uses Claude Sonnet 4.6, but you can switch to a different model (such as OpenAI GPT 5.3 Codex). Based on my experience working with Claude Sonnet 4.6, this model will work just fine in 95% of cases.
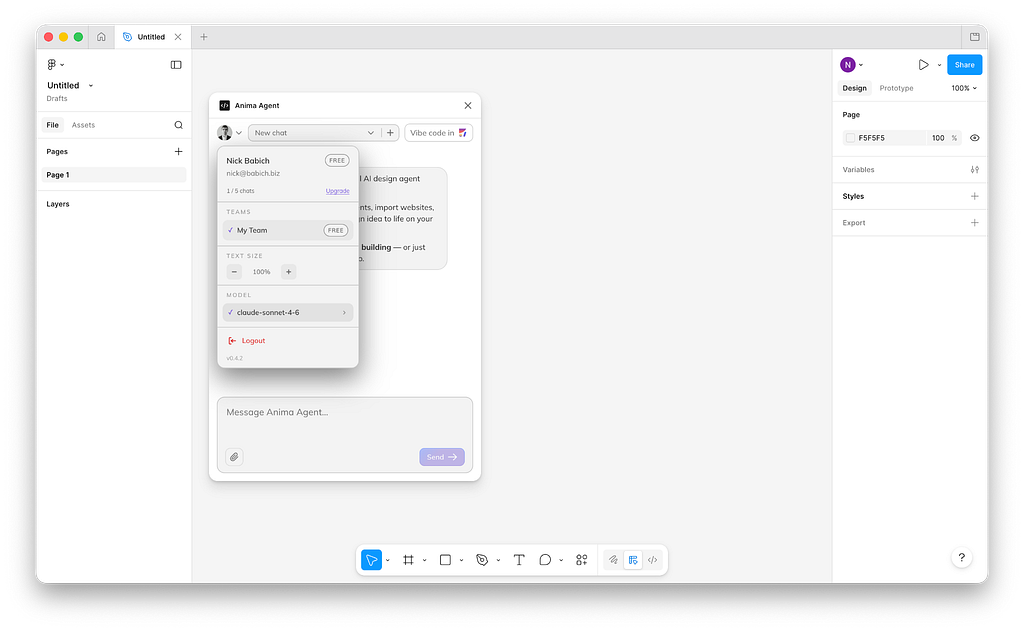
Quick note about Claude 4.6 Opus: Opus is a more advanced AI model from Anthropic, but it also consumes more tokens on average. Regarding the results, it tends to generate pretty much the same quality of the output as Sonnet 4.6, but it will consume more tokens for this, so you should choose this model only when you know why you want to use it.
Scenario 1: Creating brand new design
The process of generating a new design with Anima is straightforward. All you need to do is to describe what you want to see as a prompt and submit it to an Anima AI agent.
I will ask Anima to create a daily health monitoring app for mobile and use the following prompt:
You are a senior product designer and mobile UX expert.

Your task is to design a high-quality mobile app interface for a daily health monitoring application. The app should feel modern, clean, and production-ready (not a generic AI-generated UI).

---

## 🎯 Task
Design a mobile app that helps users track and understand their daily health metrics.

---

## 👤 Target Users
- People who want to improve their health habits
- Users tracking sleep, steps, hydration, and overall wellness
- Non-technical users who value simplicity and clarity

---

## 📱 Core Screens to Design
1. Onboarding (goal selection + personalization)
2. Home Dashboard (main daily overview)
3. Activity Tracking (steps, movement, calories)
4. Sleep Tracking
5. Hydration Tracking
6. Insights & Trends (weekly/monthly health data)
7. Profile / Settings

---

## 🧠 UX Requirements
- Prioritize clarity and low cognitive load
- Show the most important data first (progress rings, summary cards)
- Use progressive disclosure for detailed data
- Include micro-interactions (animations, transitions)
- Provide motivational elements (streaks, goals, gentle nudges)

---

## 🎨 Visual Design Requirements
- Clean, modern, Apple-level design quality
- Soft color palette (health-oriented: greens, blues, neutrals)
- High contrast for accessibility
- Use card-based layout with subtle shadows
- Rounded corners, generous spacing
- Typography hierarchy must be clear and readable

---

## 📊 Components to Include
- Progress rings (daily goals)
- Line charts (health trends)
- Cards (metrics like steps, sleep, hydration)
- Toggle switches and input controls
- Bottom navigation bar

---

## ⚙️ Design System Guidelines
- Consistent spacing system (8pt grid)
- Reusable components
- Defined typography scale
- Accessible color contrast

---

## 🚀 Expected Output
- Describe each screen in detail
- Include layout structure (top → bottom)
- Explain interaction behavior
- Provide visual style direction (colors, typography, spacing)
- Suggest component states (active, empty, loading)

---

## ⚠️ Constraints
- Avoid generic or template-like UI
- Avoid overly complex layouts
- Focus on real usability (not just visuals)
- Design for iOS-first experience

---
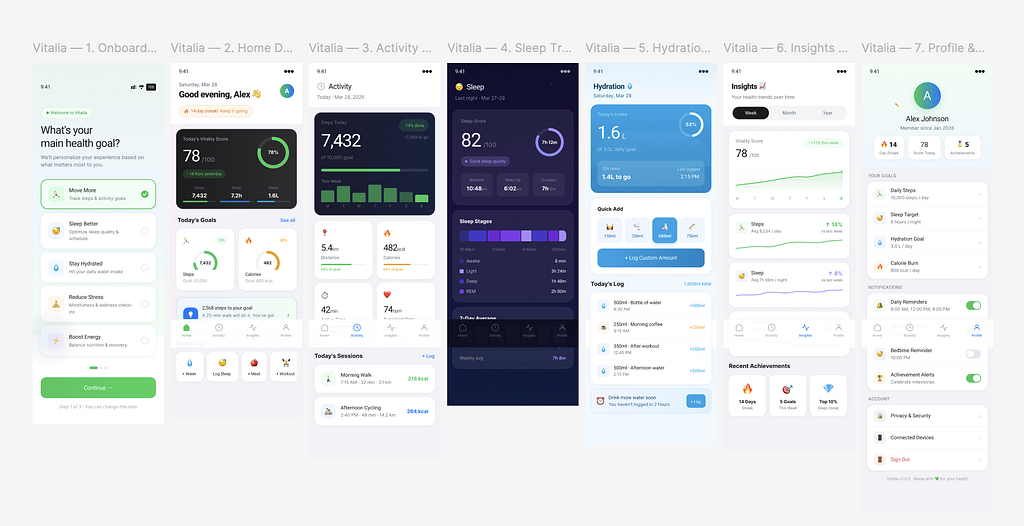
When using this tool, I typically ask it to create 5–7 core pages/screens that represent the website/app. I expect that all screens will be created with the same look and feel, making them easy to use for demo purposes.
Anima Agent will inform you what it is doing along the way. For example, below you can see that the tool is working on the image generation for UI layout right now.
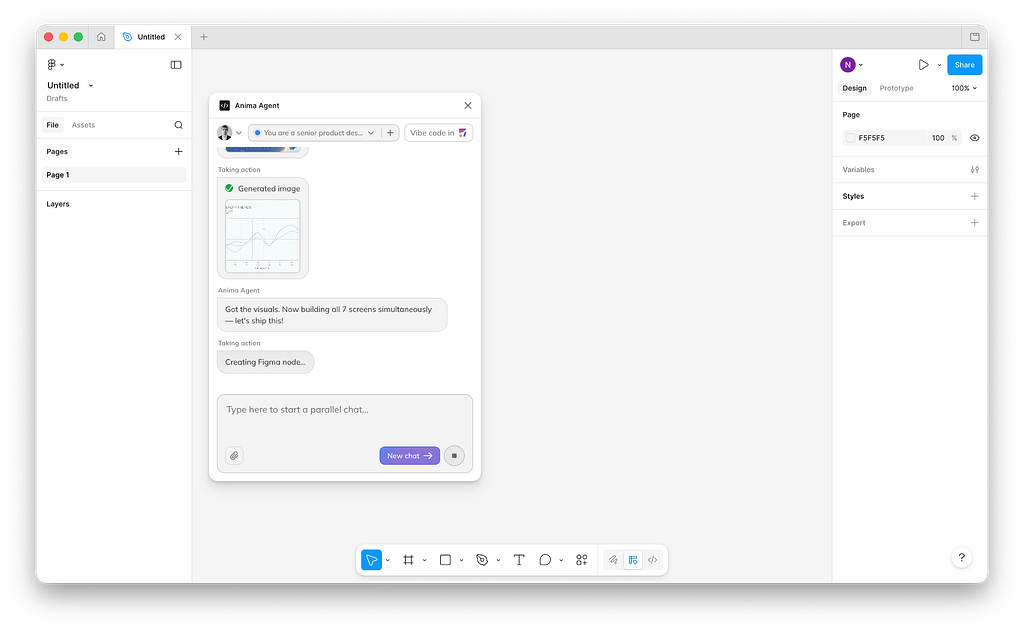
After a short wait time (a couple of minutes), we will get our series of screens. And the output looks good for the first try.
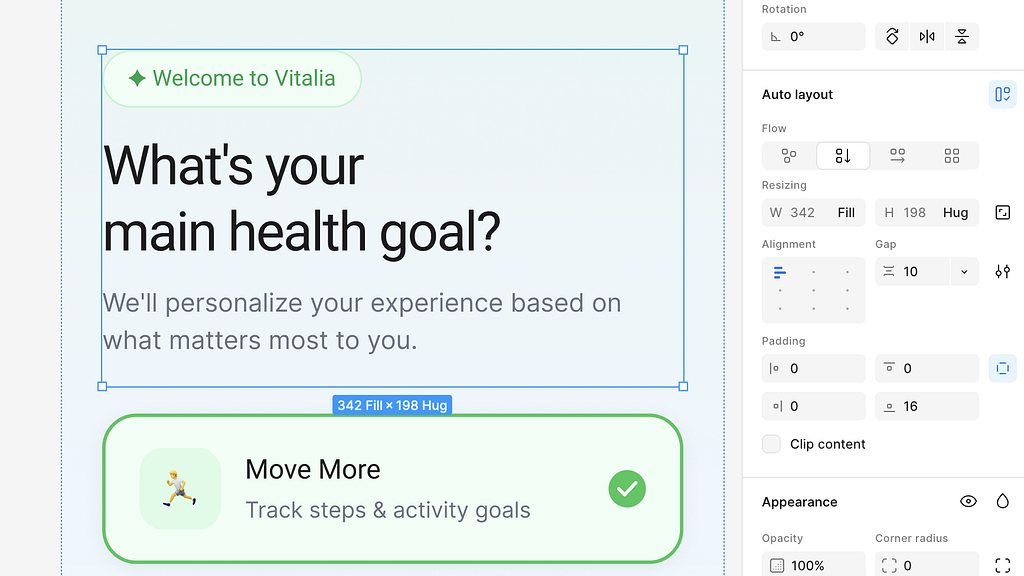
Also, the nice thing is that the design has a built-in auto-layout right from the beginning which makes it easy to modify.
But it’s vital to mention one important thing. The design that Anima will create might have visual defects. For example, in our example, the bottom tab bar is located in the middle of the screen for some reason.
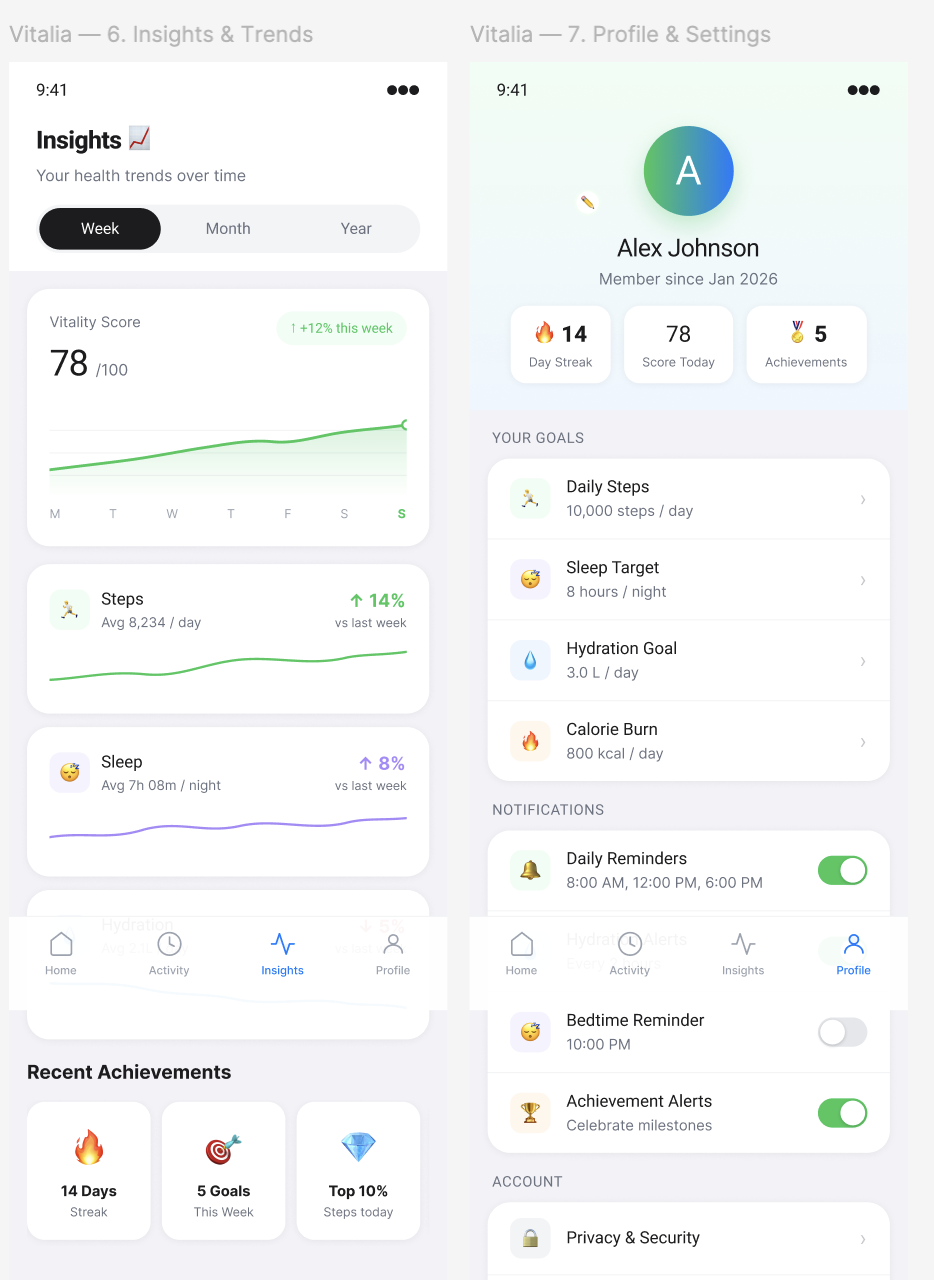
The good news is that we easily fix such issues because we have a design in Figma. But we will need to do a final check before sending this design to our dev team.
Scenario 2: Creating variants of the existing design
If you want to build a variant of an existing design, you need to select frames with your current design and submit the prompt to Anima explaining what you want to see.
Create two more variants of this screen.
Use different types of data visualization on this screen.
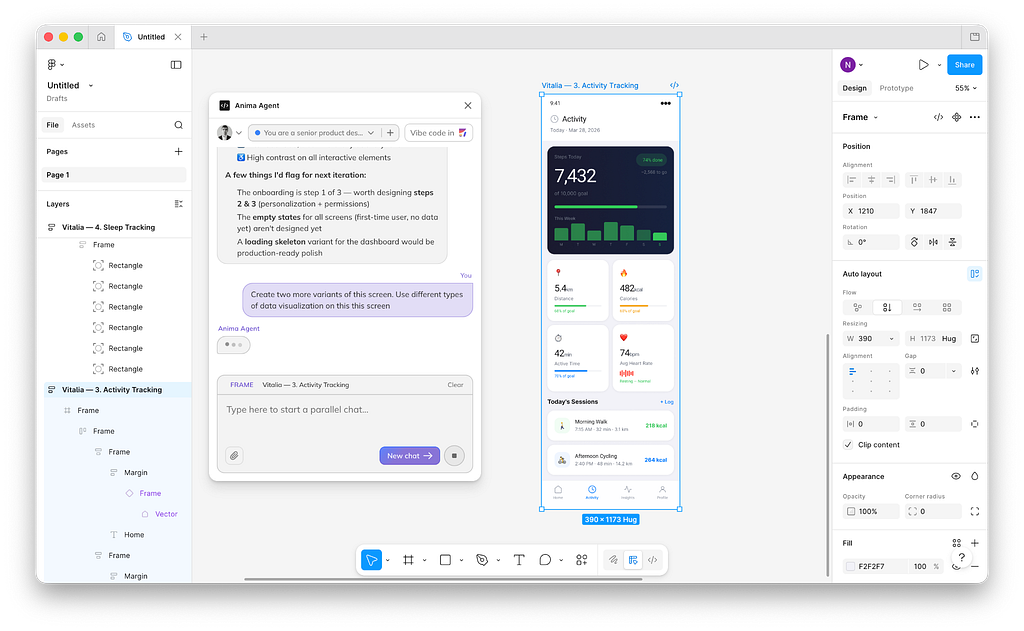
Anima will create new variants and put them side by side with existing designs.
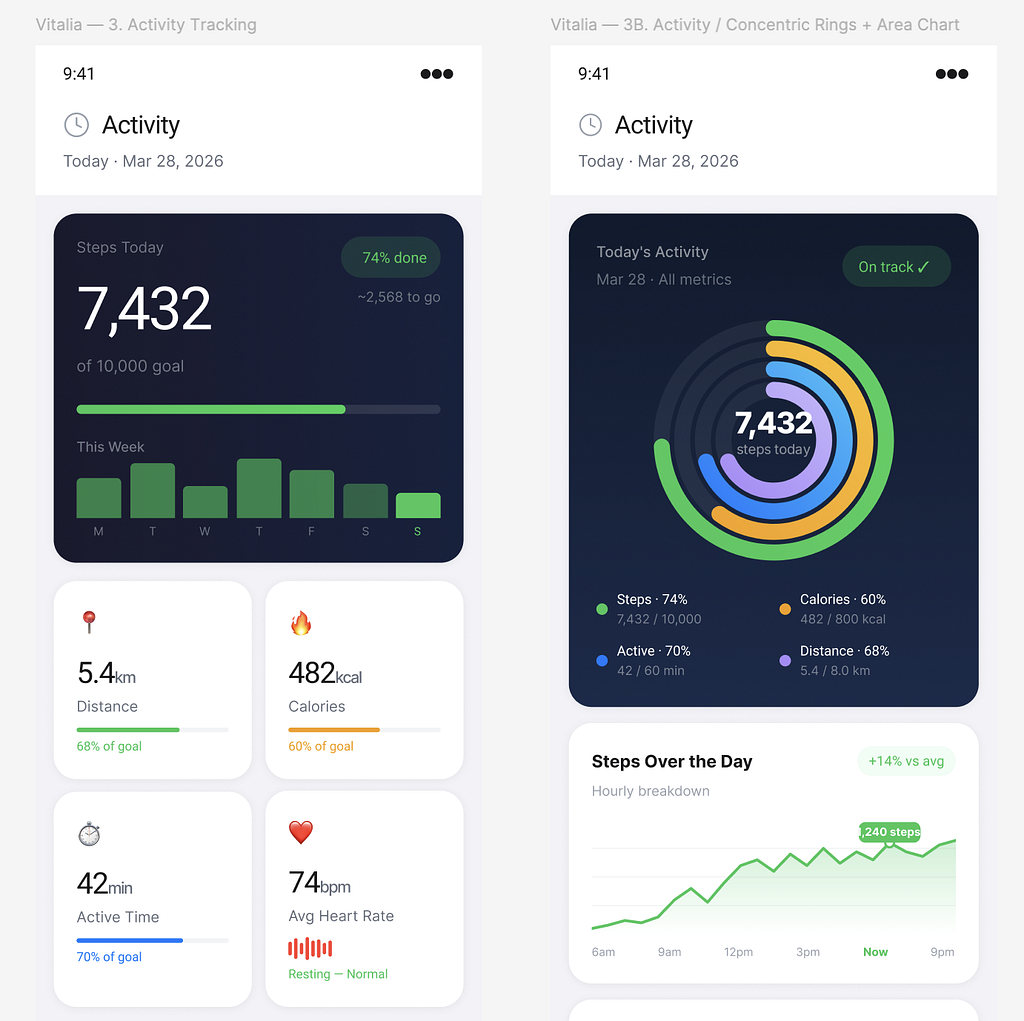
Quick tip: It’s recommended to focus on one specific thing in your design when creating variants. For example, I’ve asked Anima to create different data visualizations.
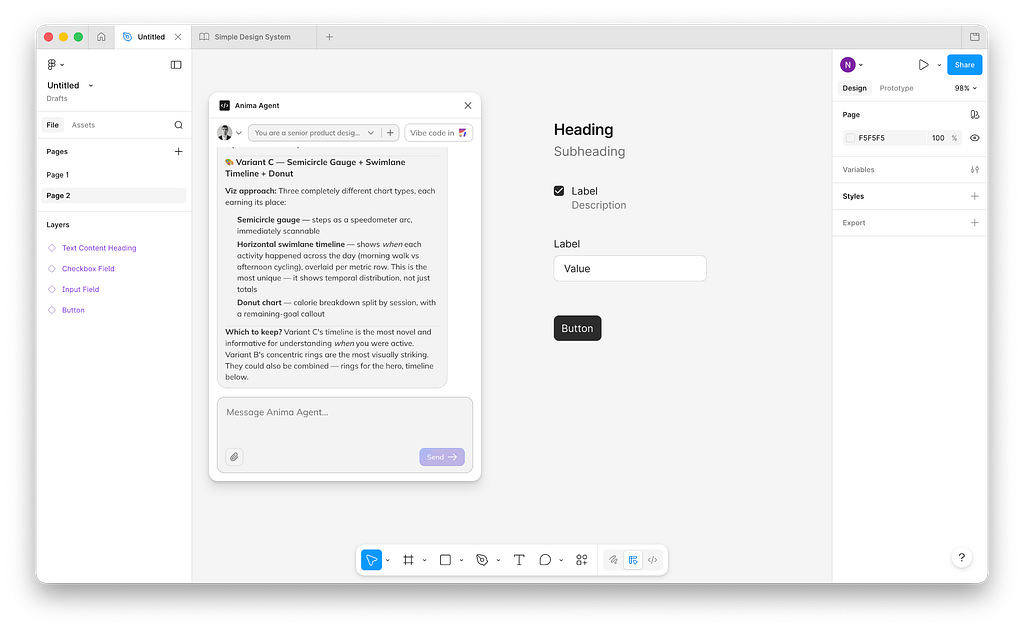
Scenario 3: Creating design using your own design system
Creating a design from scratch works well for the exploration phase of the design process. But when your org has a design system in place, you likely want to use it to craft design. Good news: Anima can help you with that. All you need to do is choose the components you want to use, and prompt Anima to create a specific design using them.
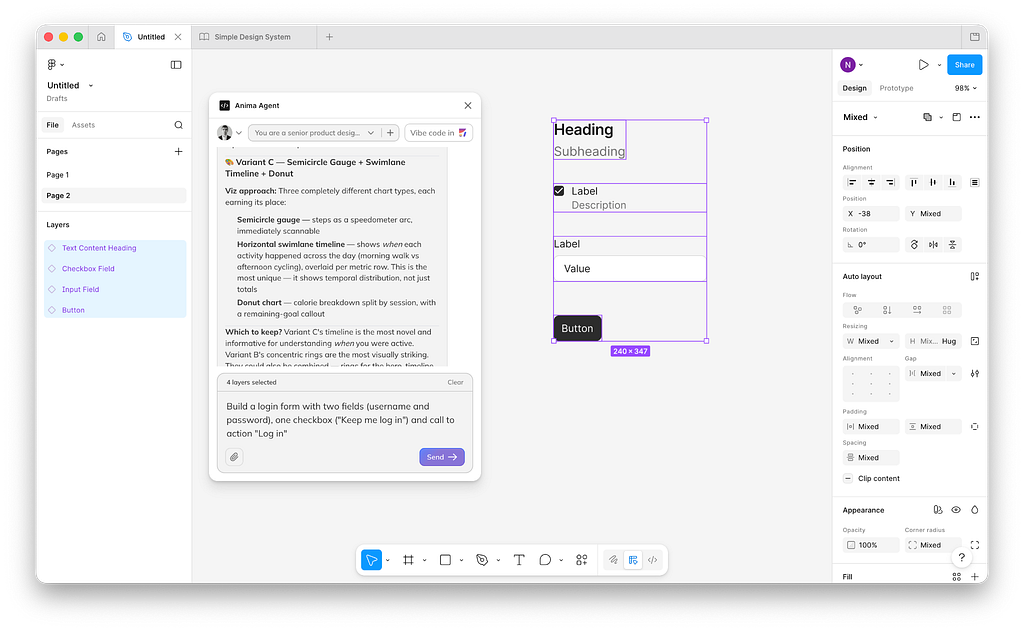
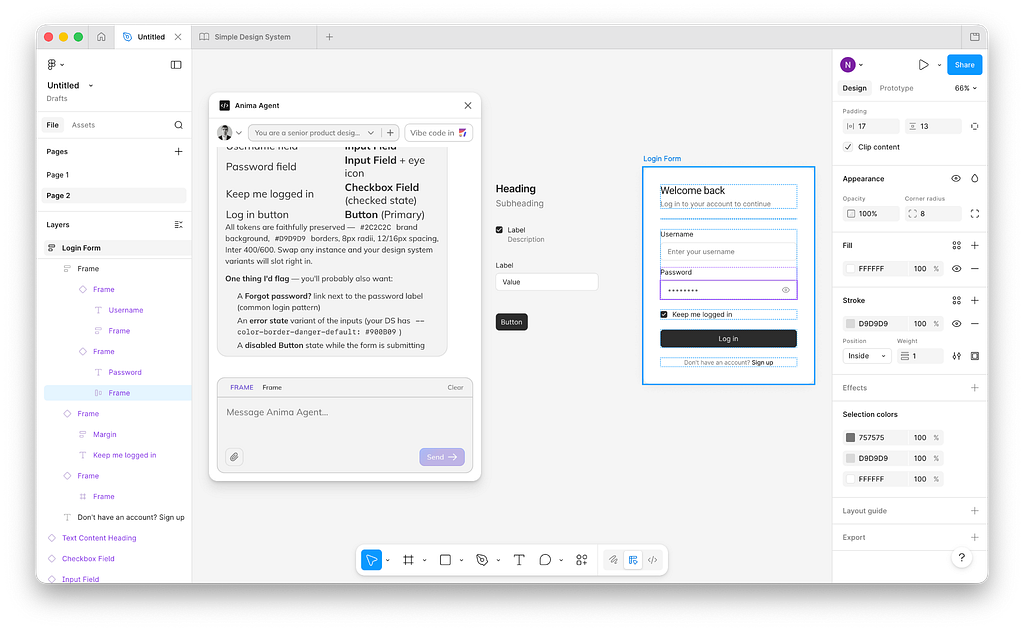
In my example, I will use 4 components (Headline, Input field, checkbox with label, and call to action button) and ask Anima to craft a login page for me.
I’ll select all 4 components and write the following prompt:
Build a login form with two fields (username and password), one checkbox
("Keep me log in") and call to action "Log in"
And here is what Anima will generate for me. As you can see login form looks great visually, as it reuses all 4 components in the final design.
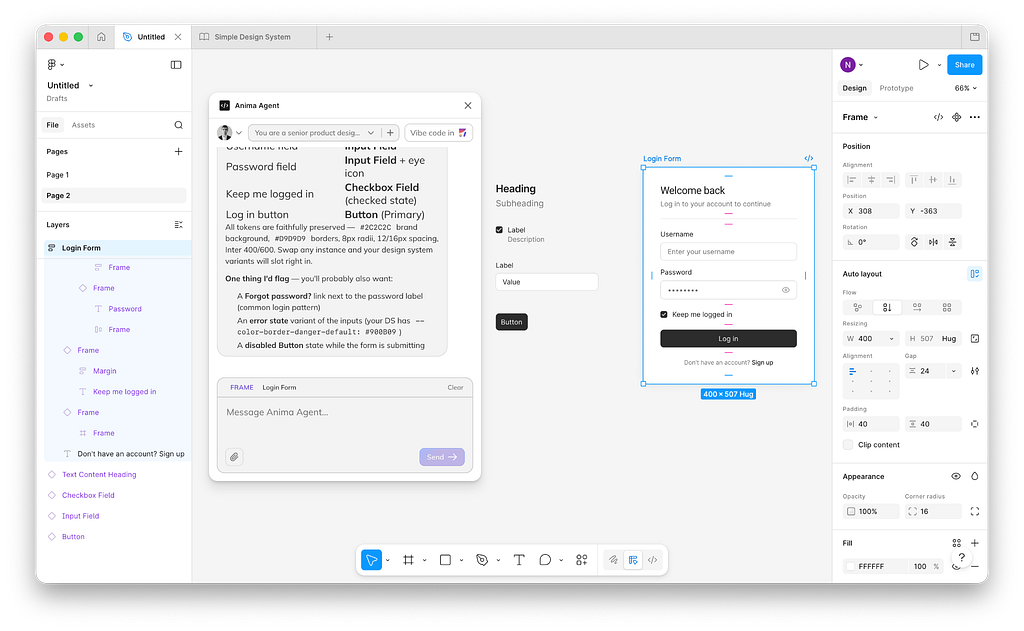
But there is one issue that I need to mention. Although the components look the same, they are detached elements and not actual Figma components. So if you click on the input field, you will see it’s basically a frame with visual properties of the original component.
Summary and final thoughts
Anima Agent is a perfect example of a modern approach to UI design. It allows you to quickly go from idea to implementation in no time and easily refine this implementation. And the great thing is that it doesn’t take control from you as you still will be able to refine the output generated by AI agent in Figma.
👉 Anima Agent plugin for Figma
![]()
The Future of UI Design is Agentic Design was originally published in UX Planet on Medium, where people are continuing the conversation by highlighting and responding to this story.